Selection Techniques/Navigation Techniques
Shortcut for zooming -
 + -
+ - or Alt and Scroll
Arrange documents button:

Magic Wand:

When you click an area in an image with the magic wand, all areas which are a similar colour are selected.
Quick Selection Tool:


You can use the Quick Selection tool
 to quickly “paint” a selection using an adjustable round brush tip. As you drag, the selection expands outward and automatically finds and follows defined edges in the image.
Lasso:


The lasso tools allow you to select precise areas of an image by drawing or tracing the selection outline.
I first chose the image that i wanted to experiment with:
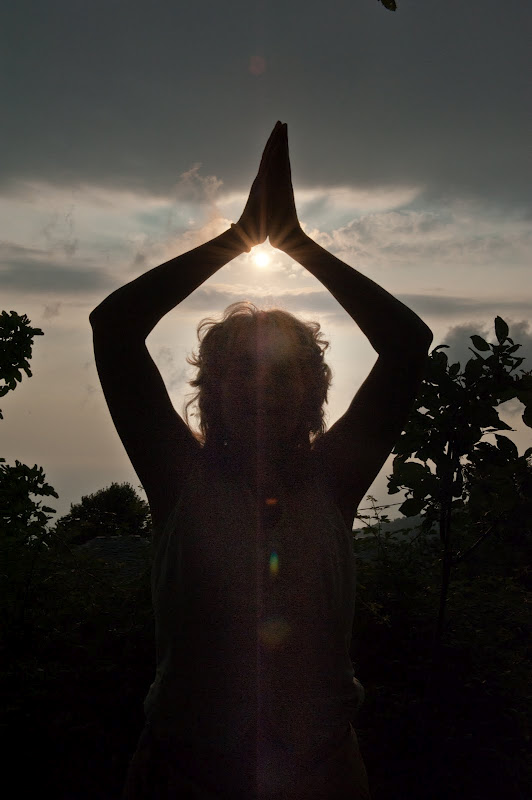
I then duplicated this layer so now i have two

I then brought my levels up and dragged it all the way to the right to show the source of the light

Then i began to use Radical Blur - Now that I had the light source identified, I distorted it into a ray of light. For this process used the properties
Amount: 100 Blur Method: Zoom
Quality: Best
I then clicked and dragged the blur center to the area where I would like the ray of light to zoom out from.


Here I blended the image into the image below it by changing the blending mode of the current layer to Screen.

Because the ray of light was blended but not very strong, I increased the visibility of the ray of light with Levels. I dragged the right input slide towards the left to the increase visibility.


I then began to do a layer mask to bring back some of the detail of the person because some of the rays were loosing the detail of the arm, hands and face.
To emphasize the colors of the ray of light, use the Hue/Saturation tool to increase the saturation. Before this I clicked on the thumbnail of the ray of light layer.


Before After
Simulating Texture

I first began by getting the texture i want and overlaying it creating a new Layer. I then applied multiply to this layer to make the lines darker and to increase the opacity.


I then added a layer mask to the textured layer:


And then began to get rid of the texture on the lips and eyes to make it look more like a layer of skin:


I then just boosted the contrast to brighten the colours


Abstract Human Manipulation with Liquid
I began by creating a new document with a grey background. I then lightly painted the background with an off white colour:


I then started to look for a picture that i felt would best work with the model image i was using.

I then used the Quick selection tool to select a piece of the milk and also for the model image:

I then refined the edges of the milk due to the dark edges:


I then pressed Ctrl + I to invert it into black colour:

I then went in with the liquify filter and selected the following settings:


With the liquifer i just wanted to make the edges more thinner and just to move the edges of the milk to where i wanted it to be.
I Duplicated this layer a few times, using free transform tool to rotate, resize, distort each duplicated layer for variety:


Finished result:

Portrait retouching
Spot healing tool:
With this tool you press Alt and then click on a fresh part of the skin that you want to put over the blemished area.


Patch tool
This tool is used to cover a large area of blemishes or to get rid of flash bulb shine:


For this you draw around the area and then drag your mouse to a clean area and then release your click - then you have a perfect Matt area!


Eyedropper Tool

This helps to even out the skin tone: I started by creating a new layer, then with the tool i set it to sample size 3x3 and then clicked on a normal area of skin. This sets the foreground colour to your subjects skin tone.
Then i took the painter tool and painted over the area i wanted to lighten.


The finished result after all the techniques:

No comments:
Post a Comment